SYNOPSIS
Sparky is a flexible and minimalist continuous integration server and distribute tasks runner written in Raku.
Sparky features:
- Defining builds scheduling times in crontab style
- Triggering builds using external APIs and custom logic
- Build scenarios are defined as Raku scripts with support of Sparrow6 DSL
- CICD code could be extended using various scripting languages
- Everything is kept in SCM repository - easy to port, maintain and track changes
- Builds gets run in one of 3 flavors - 1) on localhost 2) on remote machines via ssh 3) on docker instances
- Nice web UI to run build and read reports
- Runs in a peer-to-peer network fashion with distributed tasks support
Build status


Sparky workflow in 4 lines:
$ nohup sparkyd & # run Sparky daemon to trigger build jobs
$ nohup cro run & # run Sparky CI UI to see build statuses and reports
$ nano ~/.sparky/projects/my-project/sparrowfile  # write a build scenario
$ firefox 127.0.0.1:4000 # run builds and get reports
Installation
$ sudo apt-get install sqlite3
$ git clone https://github.com/melezhik/sparky.git
$ cd sparky && zef install .
Setup
Run database initialization script to populate database schema:
$ raku db-init.raku
Running daemon
$ sparkyd
sparkyd should be in your PATH, usually you need to export PATH=~/.raku/bin:$PATH after
zef install .
Sparky daemon traverses sub directories found at the project root directory.
For every directory found initiate build process invoking sparky worker ( sparky-runner.raku ).
Sparky root directory default location is ~/.sparky/projects.
Once all the sub directories are passed, sparky daemon sleeps for $timeout seconds.
A timeout option allows to balance a load on your system.
You can change a timeout by applying --timeout parameter when running sparky daemon:
$ sparkyd --timeout=600 # sleep 10 minutes
- You can also set a timeout by using
SPARKY_TIMEOUT environment variable:
$ SPARKY_TIMEOUT=30 sparkyd ...
Running sparky in demonized mode.
At the moment sparky can't demonize itself, as temporary workaround use linux nohup command:
$ nohup sparkyd &
To install sparkyd as a systemd unit:
$ nano utils/install-sparky-web-systemd.raku # change working directory and user
$ sparrowdo --sparrowfile=utils/install-sparkyd-systemd.raku --no_sudo --localhost
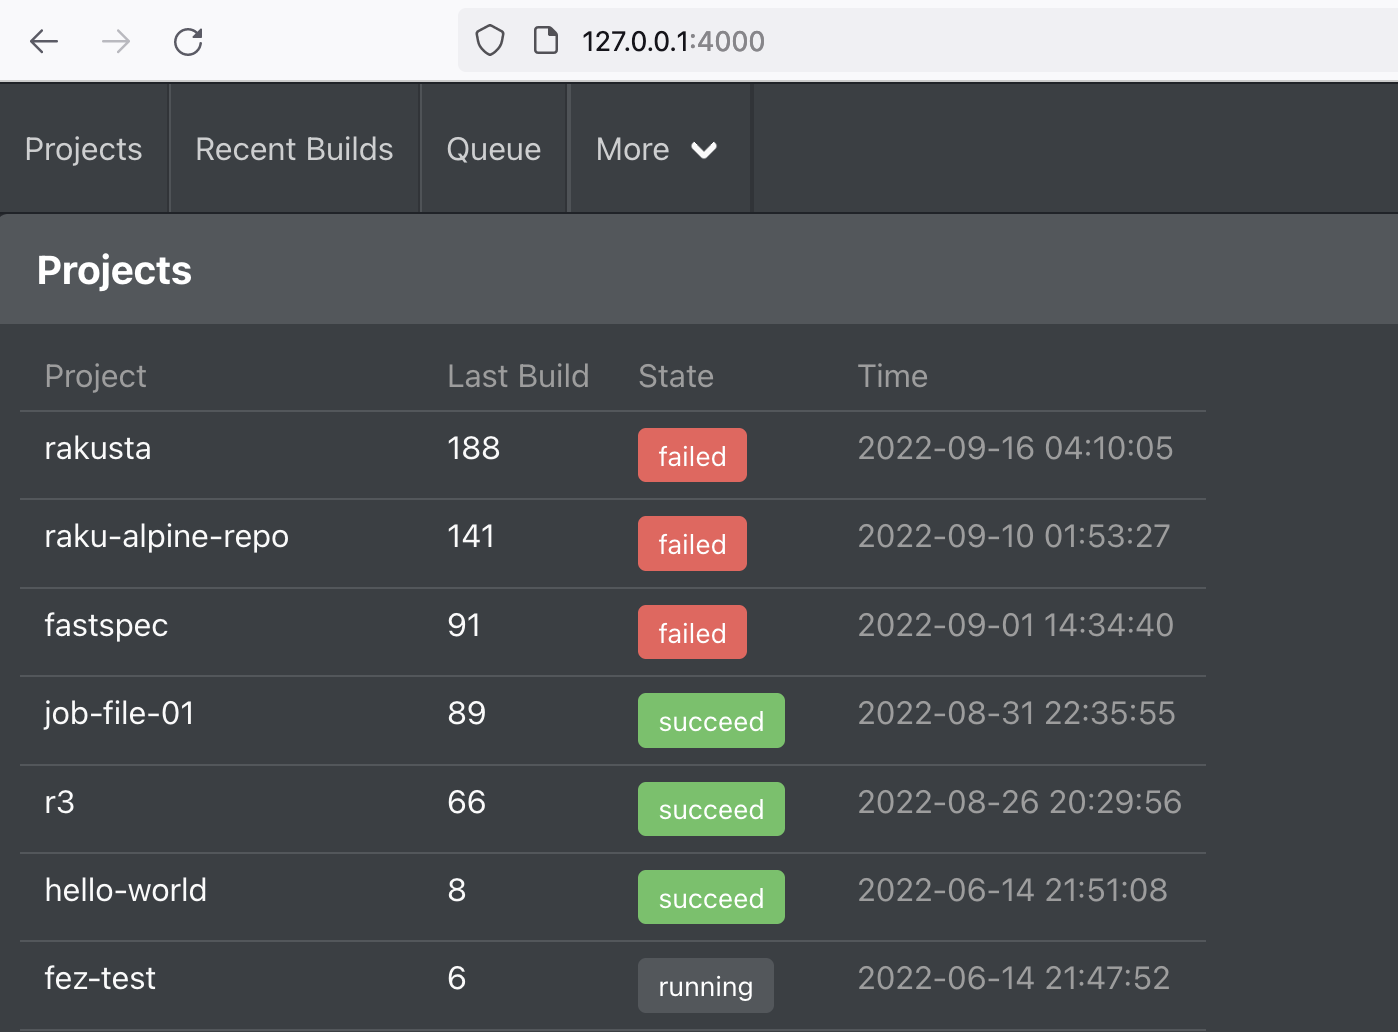
Sparky Web UI
And finally Sparky has a simple web UI to show builds statuses and reports.
To run Sparky CI web app:
$ nohup cro run &
To install Sparky CI web app as a systemd unit:
$ nano utils/install-sparky-web-systemd.raku # change working directory, user and root directory
$ sparrowdo --sparrowfile=utils/install-sparky-web-systemd.raku --no_sudo --localhost
HTTP Basic authentication
Sparky web server comes with http basic authentication.
By default "user" and "password" used for credentials, to override
default values, set following parameters in ~/sparky.yaml configuration file:
SPARKY_HTTP_BASIC_USER: user
SPARKY_HTTP_BASIC_PASSWORD: paSsworD
Setting web app tcp parameters
By default web app listens on host 0.0.0.0, port 4000, to configure web app tcp host and port
set SPARKY_HOST and SPARKY_TCP_PORT variables in ~/sparky.yaml
SPARKY_HOST: 127.0.0.1
SPARKY_TCP_PORT: 5000
Creating first sparky project
Sparky project is just a directory located at the sparky root directory:
$ mkdir ~/.sparky/projects/teddy-bear-app
Build scenario
Sparky is built on top of Sparrow/Sparrowdo, read Sparrowdo
to know how to write Sparky scenarios.
Here is a short example.
Git check out a Raku project, install dependencies and run unit tests:
$ nano ~/.sparky/projects/teddy-bear-app/sparrowfile
And add content like this:
directory "project";

git-scm 'https://github.com/melezhik/rakudist-teddy-bear.git', %(
  to => "project",
);

zef "{%*ENV<PWD>}/project", %(
  depsonly => True
);

zef 'TAP::Harness App::Prove6';

bash 'prove6 -l', %(
  debug => True,
  cwd => "{%*ENV<PWD>}/project/"
);
By default the build scenario gets executed on the same machine you run Sparky at, but you can change this
to any remote host setting Sparrowdo related parameters in the sparky.yaml file:
$ nano ~/.sparky/projects/teddy-bear-app/sparky.yaml
And define worker configuration:
sparrowdo:
  host: '192.168.0.1'
  ssh_private_key: /path/to/ssh_private/key.pem
  ssh_user: sparky
  no_index_update: true
  sync: /tmp/repo
Follow sparrowdo cli documentation for sparrowdo parameters explanation.
Skip bootstrap
Sparrowdo bootstrap takes a while, if you don't need bootstrap ( sparrow client is already installed at a target host )
use bootstrap: false option:
sparrowdo:
  bootstrap: false
Purging old builds
To remove old build set keep_builds parameter in sparky.yaml:
$ nano ~/.sparky/projects/teddy-bear-app/sparky.yaml
Put number of past builds to keep:
keep_builds: 10
That makes Sparky remove old build and only keep last keep_builds builds.
Run by cron
It's possible to setup scheduler for Sparky builds, you should define crontab entry in sparky yaml file.
for example to run a build every hour at 30,50 or 55 minute say this:
$ nano ~/.sparky/projects/teddy-bear-app/sparky.yaml
With this schedule:
crontab: "30,50,55 * * * *"
Follow Time::Crontab documentation on crontab entries format.
Manual run
If you want to build a project from web UI, use allow_manual_run:
$ nano ~/.sparky/projects/teddy-bear-app/sparky.yaml
And activate manual run:
allow_manual_run: true
Trigger build by SCM changes
** warning ** - the feature is not properly tested, feel free to post issues or suggestions
To trigger Sparky builds on SCM changes, define scm section in sparky.yaml file:
scm:
  url: $SCM_URL
  branch: $SCM_BRANCH
Where:
url - git URLbranch - git branch, optional, default value is master
For example:
scm:
  url: https://github.com/melezhik/rakudist-teddy-bear.git
  branch: master
Once a build is triggered respected SCM attributes available via tags()<SCM_*> elements:
directory "scm";

say "current commit is: {tags()<SCM_SHA>}";

git-scm tags()<SCM_URL>, %(
  to => "scm",
  branch => tags<SCM_BRANCH>
);

bash "ls -l {%*ENV<PWD>}/scm";
To set default values for SCM_URL and SCM_BRANCH, use sparrowdo tags:
sparky.yaml:
  sparrowdo:
    tags: SCM_URL=https://github.com/melezhik/rakudist-teddy-bear.git,SCM_BRANCH=master
These is useful when trigger build manually.
Disable project
You can disable project builds by setting disable option to true:
$ nano ~/.sparky/projects/teddy-bear-app/sparky.yaml

disabled: true
It's handy when you start a new project and don't want to add it into build pipeline.
Downstream projects
You can run downstream projects by setting downstream field at the upstream project sparky.yaml file:
$ nano ~/.sparky/projects/main/sparky.yaml

downstream: downstream-project
Sparky triggering protocol (STP)
Sparky Triggering Protocol allows to trigger builds automatically by just creating files with build parameters
in special format:
$ nano $project/.triggers/$key
File has to be located in project .trigger directory.
And $key should be a unique string identifying a build within directory ( on per project basis ).
A content of the file should be a Raku code returning a Raku Hash:
{
  description => "web app build",
  cwd => "/path/to/working/directory",
  sparrowdo => %(
    localhost => True,
    no_sudo   => True,
    conf      => "/path/to/file.conf"
  )
}
Sparky daemon parses files in .triggers and launch build per every file, removing file afterwards,
this process is called file triggering.
To separate different builds just create trigger files with unique names inside $project/.trigger directory.
STP allows to create supplemental APIs to implement more complex and custom build logic, while keeping Sparky itself simple.
Trigger attributes
Those keys could be used in trigger Hash. All they are optional.
cwd
Directory where sparrowfile is located, when a build gets run, the process will change to this directory.
description
Arbitrary text description of build
sparrowdo
Options for sparrowdo cli run, for example:
sparrowdo => {
  %(
    host  => "foo.bar",
    ssh_user  => "admin",
    tags => "prod,backend"
  )
}
Follow sparrowdo cli documentation for sparrowdo parameters explanation.
Job API
Job API allows to trigger new builds from a main scenario.
This allow one to create multi stage scenarios.
For example:
if tags()<stage> eq "main" {

    use Sparky::JobApi;

    my $j = Sparky::JobApi.new;

    $j.queue({
      description => "spawned job",
      tags => %(
        stage => "child",
        foo => 1,
        bar => 2,
      ),
    });

    say "job info: ", $j.info.perl;

} elsif tags()<stage> eq "child" {

  say "I am a child scenario";
  say "config: ", config().perl;
  say "tags: ", tags().perl;

}
In this example the same scenario runs for a main and child job, but
code is conditionally branched off based on a tags()<stage> value:
sparrowdo --localhost --no_sudo --with_sparky --tags=stage=main
Job attributes
A child job inherits all the main job attributes, including sparrowfile, tags, configuration file
and sparrowdo configuration.
To override some job configuration attributes, use sparrowdo and tags parameters:
my $j = Sparky::JobApi.new;
$j.queue({
   tags => %(
     stage => "child",
     foo => 1,
     bar => 2,
   ),
   sparrowdo => %(
      no_index_update => True,
      no_sudo => True,
      docker => "debian_bullseye"
  )
});
Follow sparrowdo cli documentation for sparrowdo parameters explanation.
Set a project for spawned job
One can choose to set a job project either explicitly:
  my $j = Sparky::JobApi.new: project<spawned_job>;
  $j.queue({
    description => "spawned job",
  });
The code will spawn a new job for a project called "spawned_job"
Or implicitly, with auto generated project name:
  my $j = Sparky::JobApi.new;
  $j.queue({
    description => "spawned job",
  });
This code will spawn a new job on project named $currect_project.spawned_$random_number
Where $random_number is random integer number taken from a default range - 1..4.
To increase a level of parallelism, use workers parameter:
for 1 .. 10 {
  my $j = Sparky::JobApi.new: :workers<10>;
  $j.queue({
    description => "spawned job"
  });
}
For this case a random number will be taken from a range 1..10.
Asynchronous (none blocking) wait of child jobs
Main scenario could asynchronously wait a child job
using Raku supply|tap method:
  if tags()<stage> eq "main" {

    # spawns a child job

    use Sparky::JobApi;
    my $j = Sparky::JobApi.new: :project<spawned_jobs>;
    $j.queue({
      description => "my spawned job",
      tags => %(
        stage => "child",
        foo => 1,
        bar => 2,
      ),
    });

    say "queue spawned job, ",$j.info.perl;

    my $supply = supply {

        while True {

          my $status = $j.status;

          emit %( job-id => $j.info<job-id>, status => $status );

          done if $status eq "FAIL" or $status eq "OK";

        }
    }

    $supply.tap( -> $v {
        say $v;
    });
  } elsif tags()<stage> eq "child" {

    # child job here

    say "config: ", config().perl;
    say "tags: ", tags().perl;

  }
Recursive jobs
Recursive jobs are when a child job spawns another job and so on.
Be careful not to end up in endless recursion:
  use Sparky::JobApi;

  if tags()<stage> eq "main" {

    my $j = Sparky::JobApi.new: :project<spawned_01>;

    $j.queue({
      description => "spawned job",
      tags => %(
        stage => "child",
        foo => 1,
        bar => 2,
      ),
      sparrowdo => %(
        no_index_update => True
      )
    });

    say "queue spawned job ", $j.info.perl;

  } elsif tags()<stage> eq "child" {

    say "I am a child scenario";

    my $j = Sparky::JobApi.new: :project<spawned_02>;

    $j.queue({
      description => "spawned job2. 02",
      tags => %(
        stage => "off",
        foo => 1,
        bar => 2,
      ),
    });

    say "queue spawned job ",$j.info.perl;

  } elsif tags()<stage> eq "off" {

    say "I am off now, good buy!";
    say "config: ", config().perl;
    say "tags: ", tags().perl;

  }
Predefined job IDs
Explicitly passing job-id allow to wait
to jobs that have not yet started.
Consider this scenario with recursive jobs:
use Sparky::JobApi;

sub wait-jobs(@q) {

    my @jobs;

    for @q -> $j {

      my $supply = supply {

        while True {

          my %info = $j.info;

          my $status = $j.status;

          %info<status> = $status;

          emit %info;

          done if $status eq "FAIL" or $status eq "OK";

          sleep(1);

        }

      }

      $supply.tap( -> $v {
        push @jobs, $v if $v<status> eq "FAIL" or $v<status> eq "OK";
        say $v;
      });

    }

    say @jobs.grep({$_<status> eq "OK"}).elems, " jobs finished successfully";
    say @jobs.grep({$_<status> eq "FAIL"}).elems, " jobs failed";
    say @jobs.grep({$_<status> eq "TIMEOUT"}).elems, " jobs timeouted";

}

if tags()<stage> eq "main" {

    my $rand = ('a' .. 'z').pick(20).join('');

    my $job-id = "{$rand}_1";

    Sparky::JobApi.new(:project<worker_1>,:$job-id).queue({
      description => "spawned job. 03.1",
      tags => %(
        seed => $rand,
        stage => "child",
        i => 1,
      ),
    });

    my @jobs;

    # wait all 10 recursively launched jobs
    # that are not yet launched by that point
    # but will be launched recursively
    # in "child" jobs

    for 1 .. 10 -> $i {

      my $project = "worker_{$i}";

      my $job-id = "{$rand}_{$i}";

      my $j = Sparky::JobApi.new: :$project, :$job-id;

     @jobs.push: $j;

    }

    wait-jobs @jobs;

  } elsif tags()<stage> eq "child" {

    say "I am a child job!";

    say tags().perl;

    if tags()<i> < 10 {

      my $i = tags()<i>.Int + 1;

      # do some useful stuff here
      # and launch another recursive job
      # with predefined project and job ID
      # $i variable gets incremented
      # and all recursively launched jobs
      # get waited in a "main" scenario,
      # function  wait-jobs

      my $project = "worker_{$i}";
      my $job-id = "{tags()<seed>}_{$i}";

      Sparky::JobApi.new(:$project,:$job-id).queue({
        description => "spawned job. 03.{$i}",
        tags => %(
          seed => tags()<seed>,
          stage => "child",
          i => $i,
        ),
      });
   }
}
So in this scenario job IDs get generated ahead of time while jobs get launched recursively in
subsequent jobs.
Main scenario waits till all recursive jobs finishes in none blocking Raku supply|tap fashion.
Job stash
Stash is a piece of data a job could write or read. There are two ways to use stashes.
When a child job writes a data and the a parent job reads it:
  use Sparky::JobApi;

  if tags()<stage> eq "main" {

    # spawns a child job

    my $j = Sparky::JobApi.new(:project<spawned_jobs>);
    $j.queue({
      description => "my spawned job",
      tags => %(
        stage => "child",
        foo => 1,
        bar => 2,
      ),
    });

    say "queue spawned job, ",$j.info.perl;

    my $supply = supply {

        while True {

          my $status = $j.status;

          emit %( job-id => $j.info<job-id>, status => $status );

          done if $status eq "FAIL" or $status eq "OK";

          sleep(5);

        }
    }

    $supply.tap( -> $v {
        say $v;
    });

    # read a data from child job
    say $j.get-stash().perl;


  } elsif tags()<stage> eq "child" {

    # child job here

    say "config: ", config().perl;
    say "tags: ", tags().perl;

    my $j = Sparky::JobApi.new( mine => True );

    # puts a data so that other jobs could read it
    $j.put-stash({ hello => "Sparky" });

  }
When a parent job writes a data to a child job ( before it's spawned ) and
then a child job reads it:
  use Sparky::JobApi;

  if tags()<stage> eq "main" {

    # spawns a child job

    my $j = Sparky::JobApi.new(:project<spawned_jobs>);

    # prepare a data for a child job
    # so that when it starts
    # it could read it

    $j.put-stash({ hello => "world" });

    $j.queue({
      description => "my spawned job",
      tags => %(
        stage => "child",
        foo => 1,
        bar => 2,
      ),
    });

    say "queue spawned job, ",$j.info.perl;

    wait-jobs(($j,)) # wait till a job has finished

  } elsif tags()<stage> eq "child" {

    # child job here

    say "config: ", config().perl;
    say "tags: ", tags().perl;

    # read a data prepared by a parent job

    my $j = Sparky::JobApi.new( mine => True );

    say $j.get-stash().perl;

  }
In general form a job write a data to stash by using put-stash method:
my $j = Sparky::JobApi.new();
$j.put-stash({ hello => "world", list => [ 1, 2, 3] });
$j.queue; # job will be queued and get an access to a data via `get-stash` method
A data written has to a be any Raku data structure that could be
converted into JSON format.
To read a data from a current job, use mine => True parameter of
Sparky::JobApi constructor.
# read a data in this job stash
my $j = Sparky::JobApi.new( mine => True );
$j.get-stash();
To read a data from a specific job, specify project and job-id in
Sparky::JobApi constructor:
# read a data from a specific job stash
my $j = Sparky::JobApi.new( :$project, :$job-id );
$j.get-stash();
Job files
Job files are similar to job stash, but used to transfer files between jobs, not
structured Raku hashes.
Here is an example how one can share file between child and parent job:
use Sparky::JobApi;

class Pipeline

  does Sparky::JobApi::Role

  {

    method stage-main {

      say "hello from main ...";

      my $j = self.new-job;

      $j.queue: %(
        tags => %(
          stage => "child"
        )
      );

      my $st = self.wait-job($j);

      die unless $st<OK>;

      say $j.get-file("README",:text);

    }

    method stage-child {

      say "hello from child";

      my $j = Sparky::JobApi.new: mine => True;

      task-run "http/GET 1.png", "curl", %(
        args => [
          %(
            'output' => "{$*CWD}/README.md"
          ),
        [
          'silent',
          '-f',
          'location'
        ],
        #'https://raw.githubusercontent.com/melezhik/images/master/1.png'
        'https://raw.githubusercontent.com/melezhik/images/master/README.md'
        ]
      );

      $j.put-file("{$*CWD}/README.md","README");

    }

  }

Pipeline.new.run;
In this example child job copy file back to a parent job using put-file method:
put-file($file-path,$file-name)
Where $file-path is a physical file path within file system and $file-name - just a name
how file will be accessible by other jobs. So when a file gets copied, a parent job will access it as:
get-file($file-name) method which return a content (*) of a file.
(*) - content will be returned as a binary string by default:
my $data = $job->get-file("data.tar.gz");
To force text mode, use :text modifier:
my $text = $job->get-file: "README.md", :text;
Class API
For OOP lovers there is a Sparky::JobApi::Role that implements some Sparky::JobApi-ish methods,
so one can write scenarios in OOP style:
use Sparky::JobApi;

class Pipeline

  does Sparky::JobApi::Role

  {

    method stage-main {

      my $j = self.new-job: :project<spawned_011>;

      $j.queue({
        description => "spawned job. 01",
        tags => %(
          stage => "child",
        ),
      });

      say "job info: ", $j.info.perl;

      my $st = self.wait-job($j);

      say $st.perl;

      die if $st<FAIL>;

    }

    method stage-child {

      say "I am a child scenario";
      say "config: ", config().perl;
      say "tags: ", tags().perl;

    }

  }

Pipeline.new.run;
To run pipeline:
sparrowdo --localhost --no_sudo --with_sparky --tags=stage=main
Sparky::JobApi::Role methods:
Wrapper around Sparky::JobApi.new, takes the same parameters and return an instance of Sparky::JobApi class
Wait jobs and return state as Raku hash:
%(
  OK => $number-of-successfully-finished jobs,
  FAIL => $number-of-failed jobs,
)
To set timeout for making http request to get job statues, use %args:
self.wait-jobs(@jobs, %( timeout => 10));
To enable debug mode:
self.wait-jobs(@jobs, %( debug => True));
The same as wait-jobs(@jobs,%args?), but for a single job
Cluster jobs
One can have more then one Sparky instances and run jobs across them.
This feature is called cluster jobs:
use Sparky::JobApi;

if tags()<stage> eq "main" {
  my $j = Sparky::JobApi.new(:api<http://sparrowhub.io:4000>);
  $j.queue({
    description => "child job"
    tags => %(
      stage => "child"
    )
  });
}
The code above will run job on sparky instance located at http://sparrowhub.io:4000 address.
All what has been said before applies to cluster jobs, they are no different from your
local Sparky jobs.
For example one can run cluster on docker instance alpine-with-raku running on remote Sparky server:
  my $j = Sparky::JobApi.new(:api<http://sparrowhub.io:4000>);
  $j.queue({
    description => "child job"
    tags => %(
      stage => "child"
    ),
    sparrowdo => %(
      docker => "alpine-with-raku",
      no_sudo => True
    ),
  });
For security reason Sparky server calling jobs on another Sparky server need to have the same
security token.
Set up ~/sparky.yaml file on both local and remote Sparky servers:
SPARKY_API_TOKEN: secret123456
SPARKY_API_TOKEN should be any random string.
Apparently one can have many Sparky servers logically combined into a cluster, and
all servers within a group can run remote jobs on each other, the only requirement
is they all have to share the same SPARKY_API_TOKEN
For now http/https protocol are supported for cluster jobs URLs.
See also "SSL support" section.
Sparky plugins
Sparky plugins are extensions points to add extra functionality to Sparky builds.
These are Raku modules get run after a Sparky project finishes or in other words when a build is completed.
To use Sparky plugins you should:
Install Sparky plugins
You should install a module on the same server where you run Sparky at. For instance:
$ zef install Sparky::Plugin::Email # Sparky plugin to send email notifications
In project's sparky.yaml file define plugins section, it should be list of Plugins and its configurations.
For instance:
$ cat sparky.yaml
That contains:
plugins:
  - Sparky::Plugin::Email:
    parameters:
      subject: "I finished"
      to: "happy@user.email"
      text: "here will be log"
  - Sparky::Plugin::Hello:
    parameters:
      name: Sparrow
Creating Sparky plugins
Technically speaking Sparky plugins should be just Raku modules.
For instance, for mentioned module Sparky::Plugin::Email we might have this header lines:
use v6;

unit module Sparky::Plugin::Hello;
That is it.
The module should have run routine which is invoked when Sparky processes a plugin:
our sub run ( %config, %parameters ) {

}
As we can see the run routine consumes its parameters as Raku Hash, these parameters are defined at mentioned sparky.yaml file,
at plugin parameters: section, so this is how you might handle them:
sub run ( %config, %parameters ) {

  say "Hello " ~ %parameters<name>;

}
You can use %config Hash to access Sparky guts:
%config<project> - the project name%config<build-id> - the build number of current project build%cofig<build-state> - the state of the current build
For example:
sub run ( %config, %parameters ) {

  say "build id is: " ~ %parameters<build-id>;

}
Alternatively you may pass some predefined parameters plugins:
- %PROJECT% - equivalent of
%config<project> - %BUILD-STATE% - equivalent of
%config<build-state> - %BUILD-ID% - equivalent of
%config<build-id>
For example:
$ cat sparky.yaml
That contains:
plugins:
  - Sparky::Plugin::Hello:
    parameters:
      name: Sparrow from project %PROJECT%
Limit plugin run scope
You can defined when to run plugin, here are 3 run scopes:
anytime - run plugin irrespective of a build state. This is default valuesuccess - run plugin only if build has succeededfail - run plugin only if build has failed
Scopes are defined at run_scope: parameter:
- Sparky::Plugin::Hello:
  run_scope: fail
  parameters:
    name: Sparrow
An example of Sparky plugins
An example Sparky plugins are:
SSL Support
Sparky web server may run on SSL. To enable this add a couple of parameters to ~/sparky.yaml
configuration file:
SPARKY_USE_TLS: true
tls:
 private-key-file: '/home/user/.sparky/certs/www.example.com.key'
 certificate-file: '/home/user/.sparky/certs/www.example.com.cert'
SPARKY_USE_TLS enables SSL mode and tls section has paths to ssl certificate ( key and certificate parts ).
Command line client
You can build the certain project using sparky command client called sparky-runner.raku:
$ sparky-runner.raku --dir=/home/user/.sparky/projects/teddy-bear-app
Or just:
$ cd ~/.sparky/projects/teddy-bear-app && sparky-runner.raku
Sparky runtime parameters
All this parameters could be overridden by command line ( --root, --work-root )
Root directory
This is sparky root directory, or directory where Sparky looks for the projects to get built:
~/.sparky/projects/
Work directory
This is working directory where sparky might place some stuff, useless at the moment:
~/.sparky/work
Environment variables
SPARKY_SKIP_CRON
You can disable cron check to run project forcefully, by setting SPARKY_SKIP_CRON environment variable:
$ export SPARKY_SKIP_CRON=1 && sparkyd
SPARKI_MAX_JOBS
Threshold of concurrent jobs maximum number. Use it to protect Sparky server from overload.
(WARNING! This variable is not currently supported)
SPARKY_ROOT
Sets the sparky root directory
SPARKY_HTTP_ROOT
Set sparky web application http root. Useful when proxy application through Nginx:
SPARKY_HTTP_ROOT='/sparky' cro run
SPARKY_TIMEOUT
Sets timeout for sparky workers, see Running daemon section.
SPARKY_JOB_TIMEOUT
How many seconds wait till a job is considered as timeouted (used in Sparky Job API calls).
Running under other databases engines (MySQL, PostgreSQL)
By default Sparky uses sqlite as database engine, which makes it easy to use when developing.
However sqlite has limitation on transactions locking whole database when doing inserts/updates (Database Is Locked errors).
if you prefer other databases here is guideline.
Create sparky configuration file
You should defined database engine and connection parameters, say we want to use MySQL:
$ nano ~/sparky.yaml
With content:
database:
  engine: mysql
  host: $dbhost
  port: $dbport
  name: $dbname
  user: $dbuser
  pass: $dbpassword
For example:
database:
  engine: mysql
  host: "127.0.0.1"
  port: 3306
  name: sparky
  user: sparky
  pass: "123"
Installs dependencies
Depending on platform it should be client needed for your database API, for example for Debian we have to:
$ sudo yum install mysql-client
Creating database user, password and schema
DB init script will generate database schema, provided that user defined and sparky configuration file has access to
the database:
$ raku db-init.raku
That is it, now sparky runs under MySQL!
Change UI theme
Sparky uses Bulma as a CSS framework, you can easily change the theme
through sparky configuration file:
$ nano ~/sparky.yaml
And choose your theme:
ui:
  theme: cosmo
The list of available themes is on https://jenil.github.io/bulmaswatch/
HTTP API
Trigger builds
Trigger a project's build ( aka Sparky job )
POST /build/project/$project
Returns $key - unique build identification ( aka Sparky Job ID )
Trigger build with params
POST /build-with-tags/project/$project @json
For example:
Request data - request.json:
{
  "description" : "test build",
  "tags" : "message=hello,from=Sparky"
}
Request via curl:
curl -k  -H "Content-Type: application/json" \
--data "@request.json" \
https://127.0.0.1:4000/build-with-tags/project/hello-world
Will trigger build for hello-world project, with named parameters message and from.
Parameters are handled within Sparky scenario as:
my $message = tags()<message>;
my $from = tags()<from>;
Build status
Get project's status ( image/status of the last build ):
GET /status/$project/$key
Returns $status:
Badges
Get project's badge ( image/status of the project's last build ):
GET /badge/$project
Build report
Get build report in raw text format
GET /report/raw/$project/$key
Examples
Examples of sparky configurations could be found in a examples/ folder.
See also
Author
Alexey Melezhik